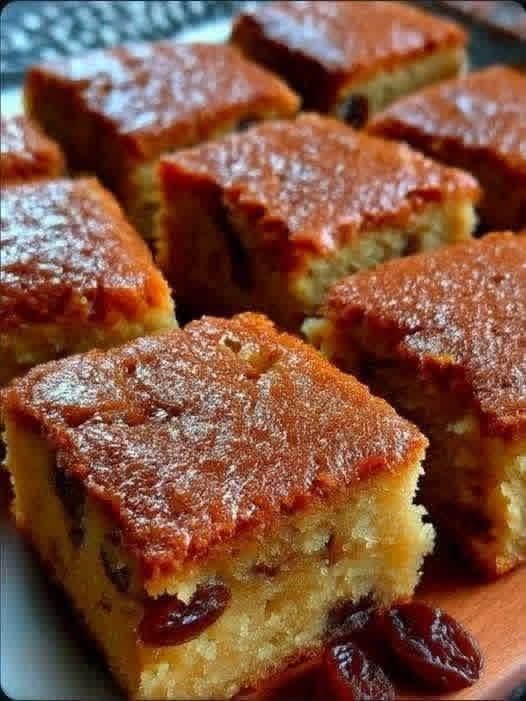
Soft, Sweet, and Perfect for Snacking
Let’s be honest—sometimes the best recipes are the simple ones. The first time I made these Raisin Cake Bars, I wasn’t expecting anything extraordinary. But once they came out of the oven, soft, golden, and smelling like cinnamon and vanilla, I was completely sold.
They’re tender, lightly chewy, sweet without being overwhelming, and packed with juicy raisins. Even better, you can mix the batter with simple pantry staples and have a homemade snack ready in no time.
These bars are perfect for lunchboxes, afternoon snacks, quick breakfasts, or those moments when everyone suddenly decides they’re hungry at the same time.
Why You’ll Love These Raisin Cake Bars
- Easy to make: The batter comes together with minimal effort.
- Simple ingredients: Mostly everyday pantry and refrigerator staples.
- Soft and tender: Yogurt makes them especially moist.
- Family-friendly: A great homemade alternative to packaged snacks.
- Freezer-friendly: Make a batch ahead and save some for later.
Ingredients
- 2 cups all-purpose flour
- 1 teaspoon baking powder
- ½ teaspoon baking soda
- ½ teaspoon salt
- 1 teaspoon ground cinnamon, optional
- ¾ cup unsalted butter, melted
- 1 cup granulated sugar
- ½ cup brown sugar
- 2 large eggs
- 1½ teaspoons vanilla extract
- ¾ cup milk or yogurt
- 1 cup raisins
- Powdered sugar, for dusting, optional
How to Make Raisin Cake Bars
1. Prepare the Oven and Pan
Preheat your oven to 350°F (175°C).
Lightly grease a 9×13-inch baking pan, or line it with parchment paper. Parchment makes lifting and slicing the finished bars much easier—and cleanup is a whole lot simpler too.
2. Mix the Dry Ingredients
In a large bowl, whisk together the flour, baking powder, baking soda, salt, and cinnamon.
Set the mixture aside while you prepare the wet ingredients.
3. Mix the Wet Ingredients
In another bowl, combine the melted butter, granulated sugar, and brown sugar. Stir until smooth.
Add the eggs one at a time, mixing well after each addition. Stir in the vanilla extract until the mixture is creamy and well combined.
4. Make the Batter
Gradually add the dry ingredients to the wet mixture.
Pour in the milk or yogurt and stir until everything is just combined. The batter should be smooth and moderately thick.
Finally, gently fold in the raisins.
If you’re making these for picky eaters, you can always reduce the amount of raisins. No judgment here!
5. Bake
Pour the batter into the prepared pan and spread it evenly.
Bake for 25–30 minutes, or until the top is lightly golden and a toothpick inserted into the center comes out clean.
Try not to eat one immediately—the bars need a little time to cool and set.
6. Cool and Slice
Let the cake cool completely in the pan before cutting it into bars.
For a simple finishing touch, dust the top with powdered sugar just before serving.
Helpful Tips
Use yogurt for extra softness.
Replacing the milk with yogurt gives these bars an especially tender and moist texture.
Make them ahead.
They’re perfect for weekend baking. Store them in an airtight container and enjoy them throughout the week.
Freeze individual portions.
Once cooled, wrap individual bars and freeze them for an easy grab-and-go snack.
They’re even better the next day.
The flavors have a chance to settle, making the bars wonderfully soft and flavorful.
Easy Variations
Want to change things up? Try one of these delicious additions:
- Add chopped walnuts or pecans for a little crunch.
- Mix in chocolate chips for a sweeter, kid-friendly version.
- Replace the raisins with dried cranberries.
- Add a pinch of nutmeg for extra warmth and spice.
- Combine raisins and chocolate chips for the best of both worlds.
Recipe at a Glance
- Prep Time: 10 minutes
- Cook Time: 25–30 minutes
- Total Time: About 40 minutes
- Servings: 12–16 bars
Final Thoughts
These Raisin Cake Bars are exactly the kind of homemade treat that makes a busy day feel a little sweeter.
They’re quick, comforting, easy to customize, and made with ingredients you probably already have at home. Whether you pack them into lunchboxes, serve them with an afternoon cup of tea, or simply keep a few on hand for snack time, they’re sure to disappear quickly.
And if your family asks you to make another batch tomorrow? Well, I’d say that’s a pretty good sign. 😊